For companies with a high volume of users or who have extensive security requirements, Single Sign-On (SSO) can make managing users easier and more streamlined. Okta SAML is one of several SSO providers that works with GoCanvas.
Adding Okta SAML
First, sign into your Okta SAML Admin Console.
- Click Applications in the left navigation.
- Click Create App Integration.
A new window will open.
- In the Platform drop down, select Web. For Sign on method, choose SAML 2.0.
- Click Next to move to the next screen.
- Name your app, upload an app logo (optional), and set your app visibility.
- Click Next to confirm those settings.
You will be presented with a Create SAML Integration page.
- Fill in the Single sign on URL, Audience URI (SP Entity ID), and make sure that the Name ID format, Application username fields match the screenshot below.
- Single sign on URL: https://www.gocanvas.com/saml/acs
- Check the box by Use this for Recipient URL and Destination URL
- Audience URL (SP Entity ID): https://www.gocanvas.com
- Name ID format: EmailAddress
- Application username: Email
- Click Next and then Finish.
On the next screen, select the View Setup Instructions button.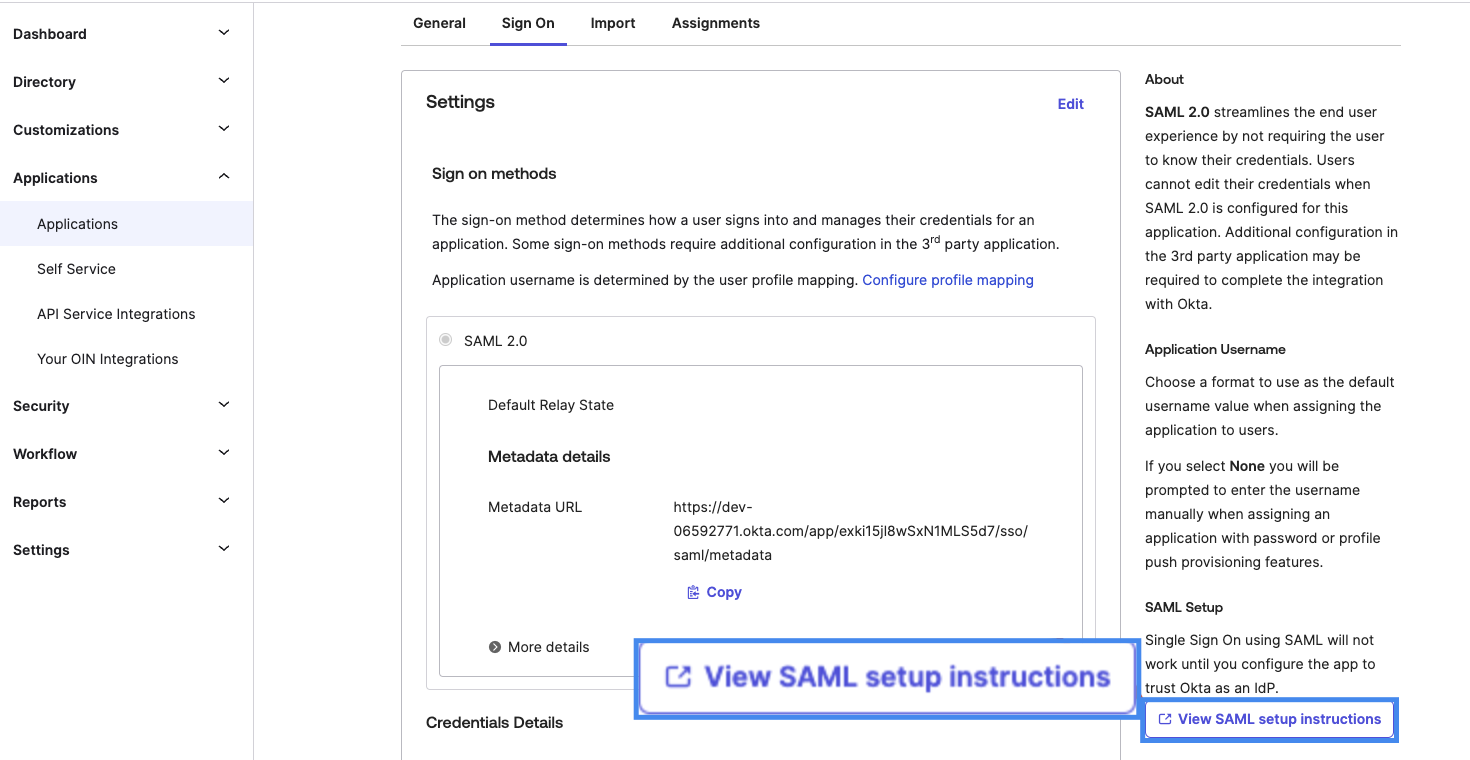
The next page will show you the information that you need to configure SSO within GoCanvas. You’ll see the Identity Provider Single Sign-On URL, Identity Provider Issuer, and the X.509 Certificate. You will need all of these, so make sure to keep this page open.
Navigate to the Account Settings page following the instructions based on your Account View.
In the left navigation, expand Account and select Account Settings.
-
At the top of the left navigation, expand the dropdown menu under the username indicating the current Department and select All.
- In the left navigation, expand Account and select Account Settings.
At the bottom of the left navigation, click your username to expand the menu and select Account.
-
At the top of the left navigation, expand the dropdown menu under the GoCanvas logo indicating the current Department and select All.
- In the left navigation, expand Account and select Account Settings.
- Scroll to the bottom of the page and click the Settings button next to Single Sign On.
- For the Issuer URI, enter the value in the Identity Provider Issuer field in Okta.
- For the Sign In URL, enter the value in the Identity Provider Single Sign-On URL field in Okta.
- If you need a Sign Out URL, enter the value in the Identity Provider Single Logout URL field in Okta.
- Add the X509 Certificate from Okta to GoCanvas, using the Upload Certificate button.
- Click Save at the bottom of the page.
You should now be able to set up and manage your GoCanvas users through Okta SAML.
Did we answer your question?
We'd really appreciate your feedback! Please leave your suggestions for improvement in the comments or let us know what you're looking for so we can assist you better. We want to help, but we need to understand your needs!
Comments
0 commentsPlease sign in to leave a comment.